Install CodeSign Protect Clients on signing workstations
Venafi code signing clients are the link between the code signing workstation and Trust Protection Platform. Venafi provides the following code signing clients:
- Windows: CSP/KSP and PKCS#11 driver, GPG SmartCard daemon
- Linux: PKCS#11 driver, GPG SmartCard daemon
- macOS: PKCS#11 driver, GPG SmartCard daemon, Keychain Integration
IMPORTANT Do not install the Windows CSP/KSP and PKCS#11 driver on the Trust Protection Platform server. Code Signing Clients should be installed on workstations from which code will be signed.
Using the CodeSign Protect Client Downloads page
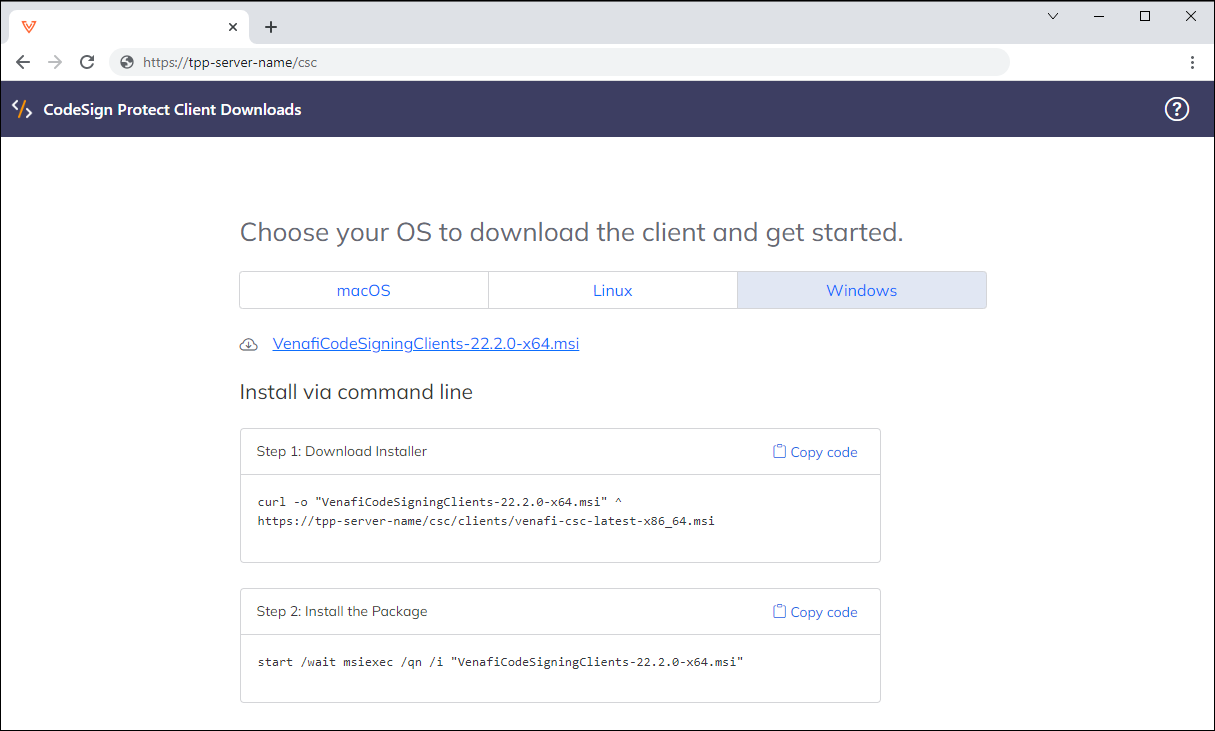
If you chose to enable the Code Signing Client Distribution component, a web page is set up that provides helpful scripting information and links for downloading CodeSign Protect clients. You can access the page by adding /csc to your Trust Protection Platform URL, such as:
https://TPP-Server-Name/csc
The following installers are available from the client download page:
macOS:
-
Installer (.dmg)
-
Portable package (.tgz)
Linux
-
Intel (amd64)
-
Package (.rpm)
-
Package (.deb)
-
Portable package (.tgz)
-
-
Arm (aarch64)
-
Package (.rpm)
-
Package (.deb)
-
Portable package (.tgz)
-
Windows
-
Installer (.msi)
-
Portable package (.zip)
NOTE All code signing clients are also available from download.venafi.com. The clients are included as part of the Trust Protection Platform .zip file.
If you are running more than one Trust Protection Platform, you can choose to use a single one. With a browser, log in to the Trust Protection Platform server. In the menu bar, click Policy Tree, and the select Platforms from the left navigation drop-down. Select the appropriate Trust Protection Platform server, then click the Settings tab, and enter the URL hostname in the Code Signing Client Distribution (/csc) field. The correct site will then be automatically detected.
The following screenshot is an example of the CodeSign Protect Client Downloads page:

For more information on automating and scripting the installation of CodeSign Protect clients, see Automate CodeSign Protect client installations (silent installation)
NOTE The Windows CSP and PKCS#11 driver are both included in the MSI files referenced in the steps below.
-
Download one of the Windows installation files from either the client download page or from download.venafi.com.
NOTE The Windows 32-bit client is available only from download.venafi.com.
NOTE To download the client using PowerShell, use Invoke-WebRequest.
Example:
Invoke-WebRequest `
-Uri "https://<tpp-server-url>/csc/clients/venafi-csc-latest-x86_64.msi" `
-OutFile "VenafiCodeSigningClients-25.1-x64.msi"
-
Run the installation file with administrator authority. The Code Signing Client installation wizard opens.
-
Accept the license agreement, and then click Next.
-
Select the location where you want the CSP to be installed, and then click Next.
-
Click Install.
Once installation completes, the CSP configuration wizard opens. For steps on configuring the CSP, see Configuring the Venafi CSP.
NOTE The CSP configuration wizard only configures the CSP. For steps on configuring PKCS#11, see Configuring the PKCS#11 driver.
Installing the CSP and PKCS#11 driver using the command line
See Installing and configuring the CSP using the command line.
Download one of the Linux installation files from either the client download page or from download.venafi.com.
Clients are available for both Intel (amd64) and Arm (aarch64) architectures. The examples below show installation on the amd64 architecture.
To install an RPM package:
sudo rpm -Uvh "venafi-codesigningclients-25.1.x-linux-x86_64.rpm"
To install a Deb package:
sudo dpkg -i "venafi-codesigningclients-25.1.x-linux-x86_64.deb"
To install a portable package (.tgz)
tar zxvf "venafi-codesigningclients-25.1.x-linux-x86_64.tar.gz"
The VenafiPKCS#11 files are installed in the /opt/venafi/codesign directory.
Next Step:
-
Download one of the macOS installation files from either the client download page or from download.venafi.com. The macOS installation files are universal.
-
Double-click the .dmg file to open it. The .dmg contains both the installation file and the uninstall script.
-
Double-click the Venafi Code Signing Clients.pkg file to run the installer.
-
The installer provides several options:
-
Integrations
This section allows you to select which CodeSign Protect client integrations you want to install. The options are PCKS#11, GPG, and macOS Keychain.
-
SDK Documentation
Installs the LibHsm SDK documentation in
/Library/Venafi/CodeSigning/html.
-
- Complete the steps on the installation wizard.
Upon completion, the utilities are installed in the /Library/Venafi/CodeSigning/bin directory, with symbolic links to it in /usr/local/bin.
Next Step:
The most current CodeSign Protect client is backwards compatible with all supported versions of Trust Protection Platform. Available features are determined by the Trust Protection Platform version, not the client version. All features from previous versions are supported in newer versions unless specifically stated otherwise.
|
Trust Protection Platform Version |
Client Features |
|---|---|
|
24.3 |
|
| 24.1 |
|
|
23.3 |
|
|
23.1 |
|
|
22.4 |
|
|
22.2 |
|
|
22.1 |
|
|
21.4 |
|